WordPress, although the most popular blogging software with thousands of users, somehow fails to be the most reliable website builder. Nowadays, reliability is something that goes along with any type of product development. Have you ever wondered if a certain update or change would shut down an entire website or make it look like it had never been up in the first place? Staging websites can be a very useful way to avoid such inconveniences and make the user experience of your website visitors seamless.
If you are still unsure whether or not you need a staging website, check the reasons below:
- It gives you the ability to test all types of changes before pushing them to your main website or going live.
- It reduces the amount of time of your website is blocked to visitors while in “Maintenance mode” because deploying the changes you have already tested takes less time.
- The chances of implementing an irreversible change are reduced to a minimum when you test before switching content to live pages.
- The aforementioned point results in your website’s higher SEO ranking and reputation while keeping your visitors satisfied.
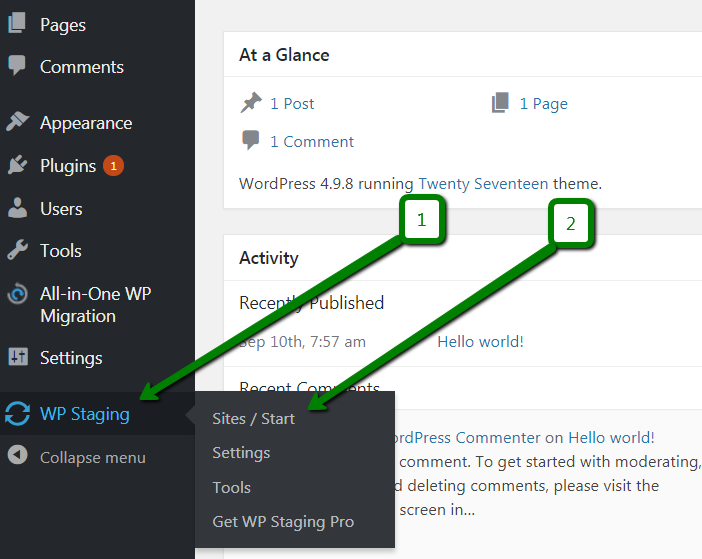
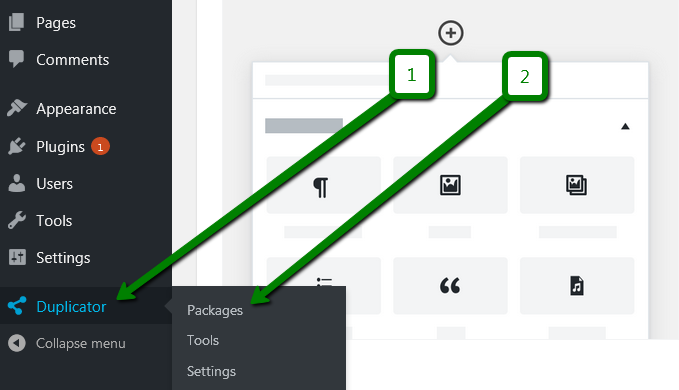
2. On the left panel click WP Staging >> Sites / Start:
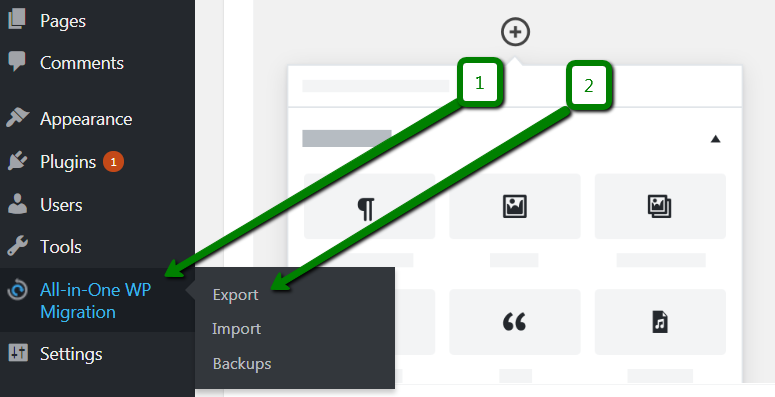
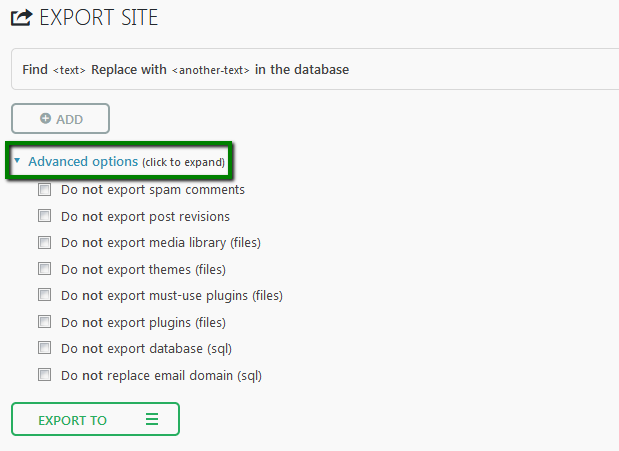
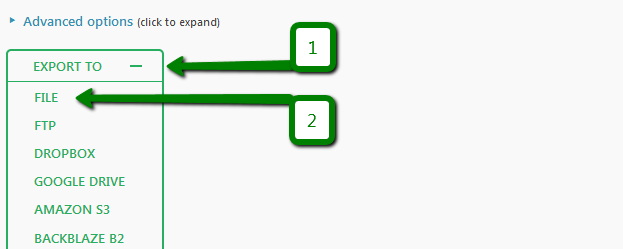
2. On the left panel click All-in-One WP Migration >> Export:
6. Install a fresh WordPress on a subdomain (e.g., staging.nctest.info) or in a subdirectory (e.g., nctest.info/staging).
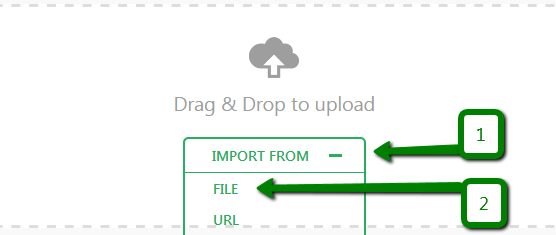
7. Log in to the WordPress Dashboard of the staging website, install the All-in-One WP Migration plugin once again and go to the Import tab:

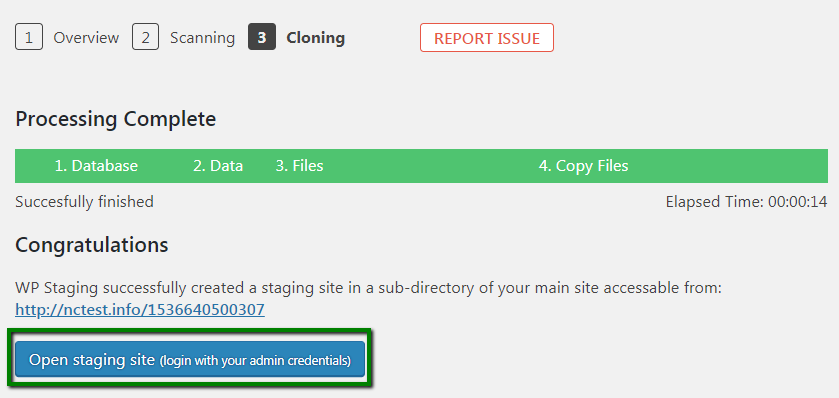
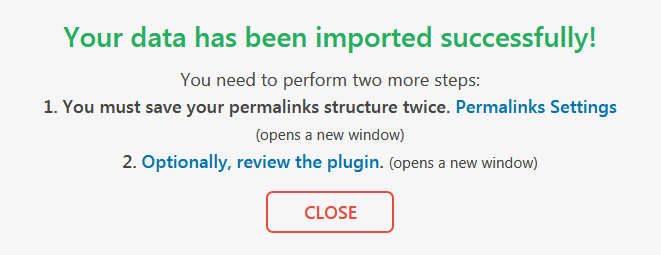
10. If your import is successful, you should see the following message:
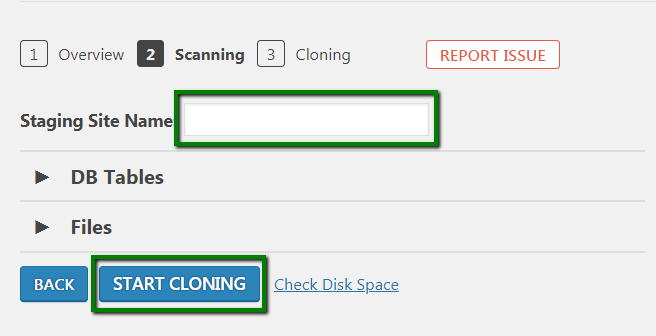
4. Enter the desired name or use a generated one. Leave other values untouched and click Next:

7. Create a subdomain for your staging website, remembering the document root. Alternatively, you can create a subdirectory under your domain’s document root.
8. Upload the previously-downloaded files to the document root of your subdomain or a subdirectory (e.g., nctest.info/staging).
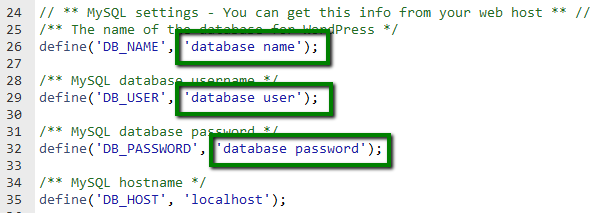
9. Create a database for your installation, remembering the following details:
- Database name
- Database user
- Database user password
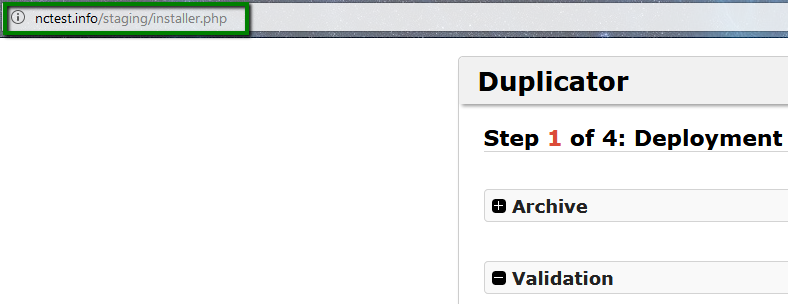
In case you upload the files to a subdirectory, it will look like: domain.com/staging/installer.php.
Don’t forget to replace domain.com with your actual domain. See below:
12. Enter the details of the database you’ve created on step 9 and click Next.
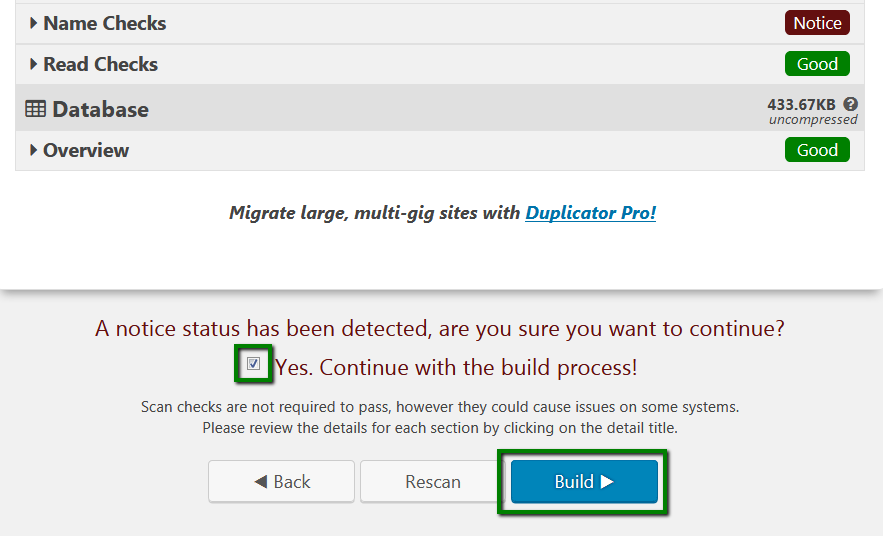
13. Click Yes in the pop-up window to confirm the details.
14. Enter the title of your website and click Next.
15. Click Site Login to be redirected to the login page. Your login details are the same as for the main website.
16. Go to the document root of your staging website and delete the installer.php file to avoid any security issues.
Now that you are familiar with the tools you are going to use, proceed with these steps:
1. Find the files of your installation. In case it’s your main hosting domain, you can find them in home/public_html folder.
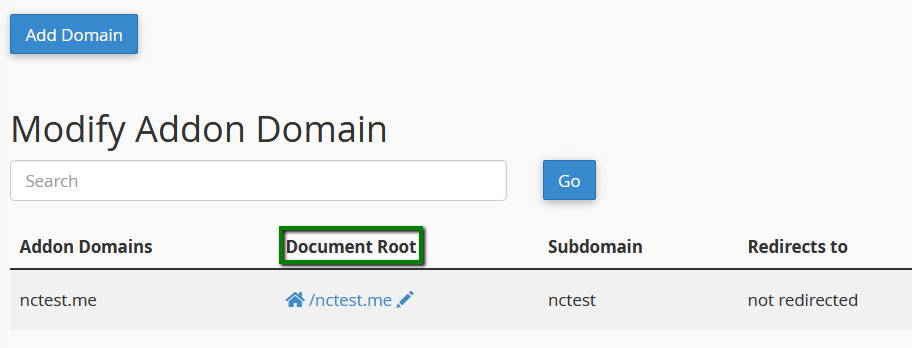
If it’s an addon domain, you can check its root folder in cPanel >> Addon Domains menu, located in the Document Root column. If it’s a subdomain, you can check it in cPanel >> Subdomains menu in the same column. See below:
2. Select all the files of the installation and copy them to the document root of the desired subdomain. Alternatively, you can create a directory in the document root of your website and copy the files into that folder for your website staging URL to look like domain.com/staging.
Just below, you should see the name of your website database. See below: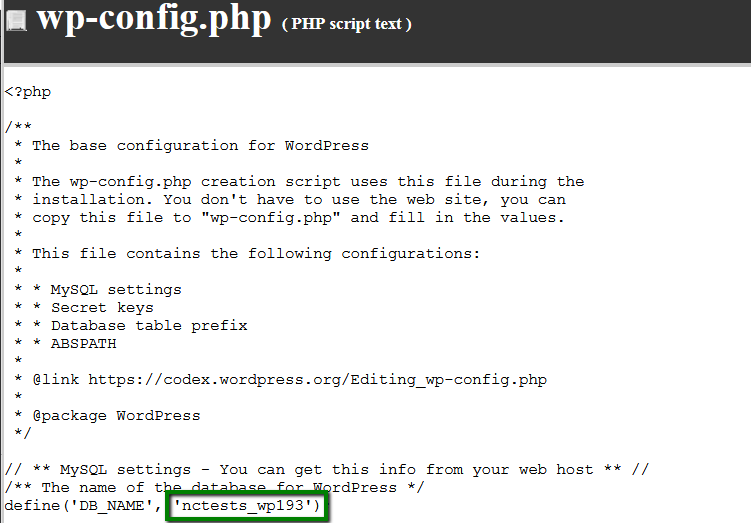
5. Update the URL of your website to the desired one using this guide.
For example, if we want the URL of our staging area to be nctest.info/staging instead of nctest.info, we update the database, replacing all occurrences of nctest.info with nctest.info/staging.
6. Create a database for your staging installation, remembering the following details:
- Database name
- Database user
- Database user password
PLEASE NOTE: If the database in question exceeds the 50 MB in size, refer to this guide.
8. Using File Manager, navigate to the document root of your staging website to Edit the wp-config.php file. Fill in the lines with the appropriate name, user, and password of the database that has been created and imported before. See below for reference: