A parked domain is a domain that is associated with your cPanel account but doesn’t have its own content. Instead, it is pointed to your primary domain. In other words, when users will try to access your parked domain they will see the content of your main domain.
Step 1 – Change the nameservers
To begin with, you will need to point your domain name to our hosting nameservers (for Shared Hosting plans: dns1.wvphosthosting.com and dns2.wvphosthosting.com, for Reseller Hosting plans: your private nameservers or Reseller Hosting nameservers specified in your Welcome Email).
Guidelines on how to change your nameservers to Shared Hosting for domain names that are registered with Wvphost can be found here.
If your domain name is registered with a third-party registrar, contact their customer support and ask to change the nameservers for your domain name to the following:
Guidelines on how to change your nameservers to Shared Hosting for domain names that are registered with Wvphost can be found here.
If your domain name is registered with a third-party registrar, contact their customer support and ask to change the nameservers for your domain name to the following:
- For Shared Hosting plans: dns1.wvphosthosting.com and dns2.wvphosthosting.com
- For Reseller Hosting plans: your private nameservers or Reseller Hosting nameservers specified in your Welcome Email
Step 2 – Add the new domain name as an alias
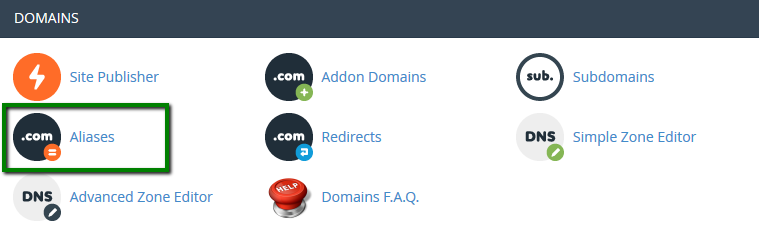
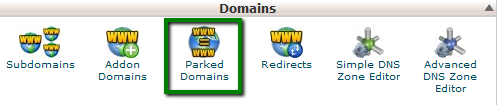
2. Navigate to the Domains section >> Aliases menu:
For cPanel Basic Theme:
For cPanel Retro Theme:
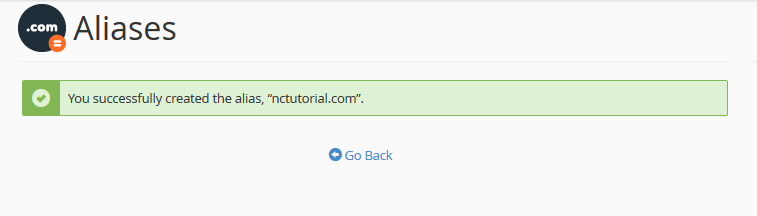
3. Enter the domain name in the Create a New Alias section and click Add Domain: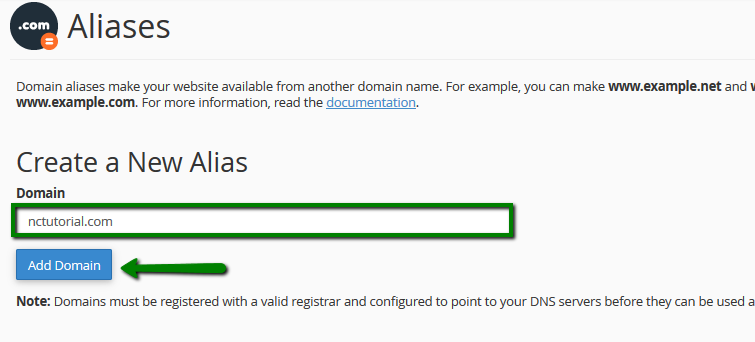
PLEASE NOTE: Parked domain names can be pointed to your main website/public_html folder only. If you want to point your domain name to a specific subfolder in your account, you need to use the Addon domains option.
If the domain name was not pointed to our hosting nameservers beforehand, you will receive an error message when adding an alias:

Sometimes, it's not possible to point your domain name to our hosting name servers. Here are a few reasons why:
- Certain domain name types require a DNS zone file to be created on the hosting provider's side in advance
- You wish to create a website first and connect the domain name with it later
- You wish to keep the domain name pointed to third-party nameservers
In such cases, proceed with the validation process described below.
Domain name control validation
If there isn’t a way to change the nameservers for your domain name, you must complete the required domain name validation process:
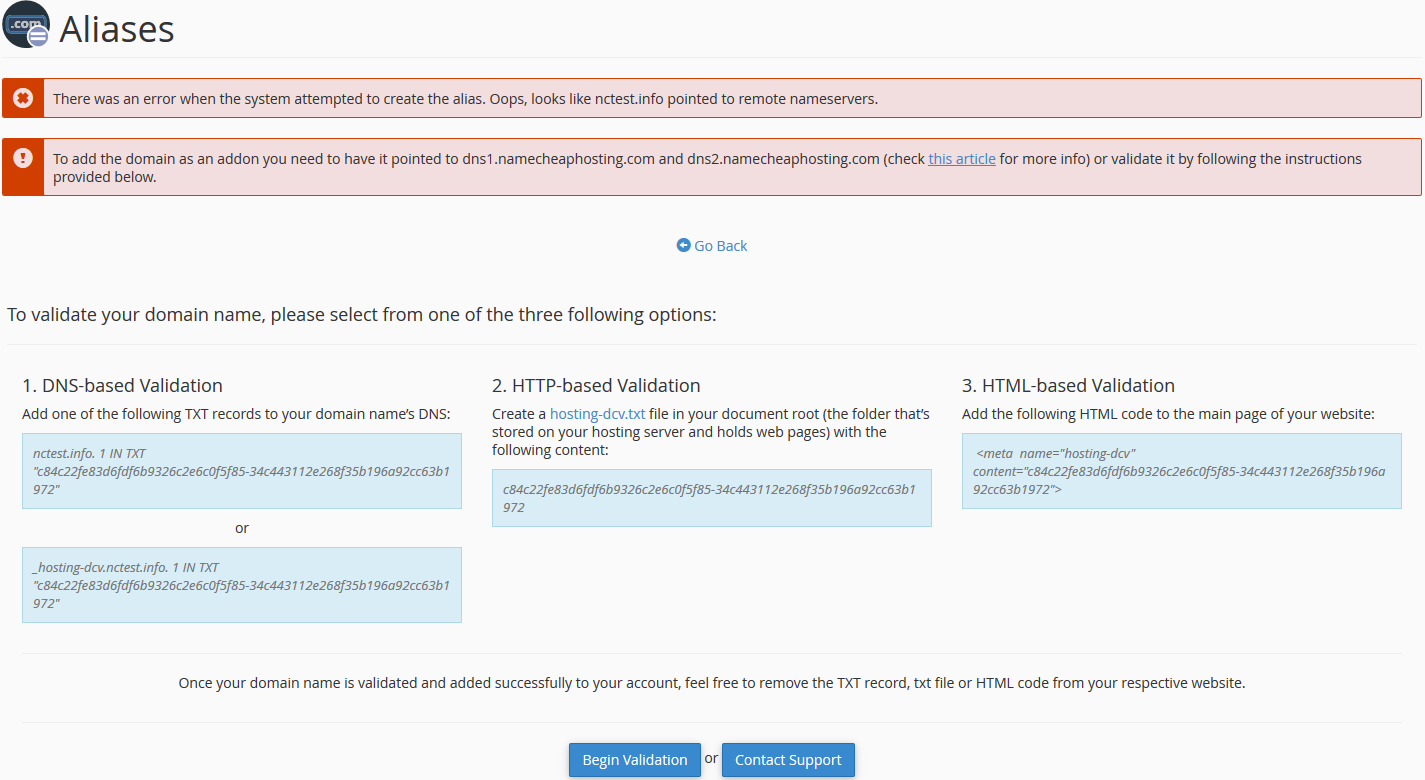
In order to be able to add your domain name, you must proceed with one of the required validation options:
- DNS-based Validation (the TXT record should be created)
- HTTP-based Validation (the HTML file should be created)
- HTML-based Validation (the provided code should be added to the head section of the main website page)
PLEASE NOTE: The provided validation code is only valid for 1 day.
As soon as the required validation record is created, go to Begin Validation.
If there are any issues with the validation, get in touch with our Hosting department via Live Chat or Ticket.
If you wish to create an email account for your newly-added domain name, feel free to refer to this guide.
As soon as the required validation record is created, go to Begin Validation.
If there are any issues with the validation, get in touch with our Hosting department via Live Chat or Ticket.
If you wish to create an email account for your newly-added domain name, feel free to refer to this guide.
How to remove an alias
If you need to remove an existing parked domain, go to the Aliases menu >> click Remove: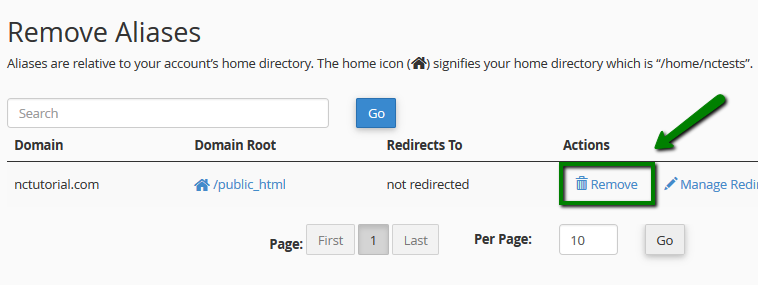
That's it!
