When dealing with a VPS or a Dedicated server, you will use Secure Shell to access the server to manage everyday tasks. If you access your server remotely (using SSH), it's a good idea to protect yourself against attacks. Here are some recommendations on how to secure your SSH login:
Accessing the server via SSH keys
Let’s have a closer look at these recommendations:
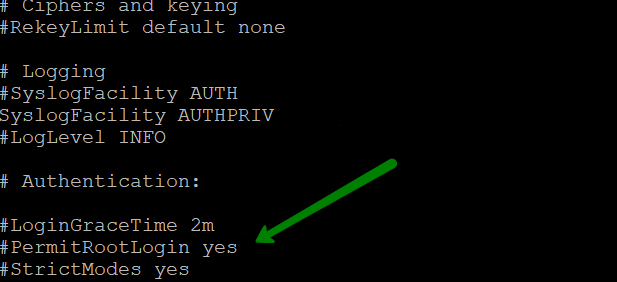
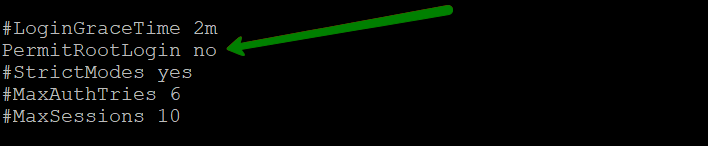
Since the root user is granted all the privileges on the server, and exposing the root login possess a threat to your entire system, it may be a wise decision to disable root logins.
Here is how to do it.
Preparation stage: Make sure to create a user with Superuser AKA: sudo rights to perform all the necessary administrative actions. Once you are logged in to the server, follow these steps:
1. To create a new user, run the following command:

Useradd is an actual command to create a user
-m - an argument which creates a user with a default home directory in the format /home/user (in this case home/techuser).
If you would like to use a different argument than the default directory, use -d argument instead of -m, and specify the desired directory e.g. /example/home/user)
-s - allows specifying the shell for the user (in this case the shell is /bin/bash)
-c - comment addition. The actual comment here is ‘Admin’
techuser - an example username. Instead of techuser you can use any username you like, just be sure to modify all the commands above accordingly).
Set a password for the newly created user (make sure you set a strong, secure password).
NOTE: While typing the new password you won’t see any symbols appear, as hidden fields don’t show anything at all. If you hesitate about your password you can press Ctrl + U to empty the field and then start from scratch.
passwd techuser


Debian (also Ubuntu):


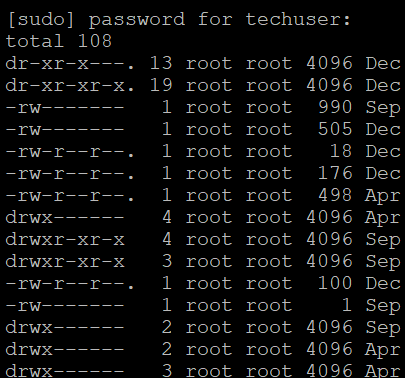
Now you can test if your newly created user has sudo rights:
Switch to the new user you've created:

For instance: sudo ls -la /root
You will be prompted to enter a password for your user which will be used to log in to the system and confirm sudo actions whenever they are required by the system.
If you did everything correctly, it will give you the file output:
Now open /etc/ssh/sshd_config. You can use nano text editor for this:

Then find (either with or without “#” in the beginning of the line):
You can edit your default SSH port in this file as well. See how to make these changes below.
By default, the SSH port is set to 22.
Locate the following line in the same file /etc/ssh/sshd_config:
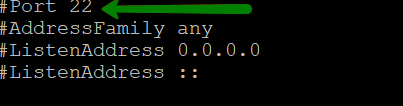

In order to test the settings you should leave 2 ports opened:
Port 22
Port 22345
Once you log out and log in again using your custom port, and have made sure it is allowing you to connect, you may comment ( putting # at the beginning of the line) or delete the string with Port 22.
Save the changes and close the file. Press Ctrl + O to save. Type Ctrl + X to exit.
To apply the settings, the SSH service needs to be restarted. If you are logged in as a techuser (or your custom created one to replace root), you will need to use the sudo command to perform this action.
Depending on your distro and its version, the required command may be different, as well as the name of SSH service (sshd for Centos and CloudLinux and ssh for Ubuntu).
In the example below we use sudo systemctl restart sshd as we run CentOS 7.

sudo /etc/init.d/sshd restart
sudo service sshd restart
sudo restart ssh
If you have turned off root login on previous stages, you will still be able to log in to your control panel with root details.
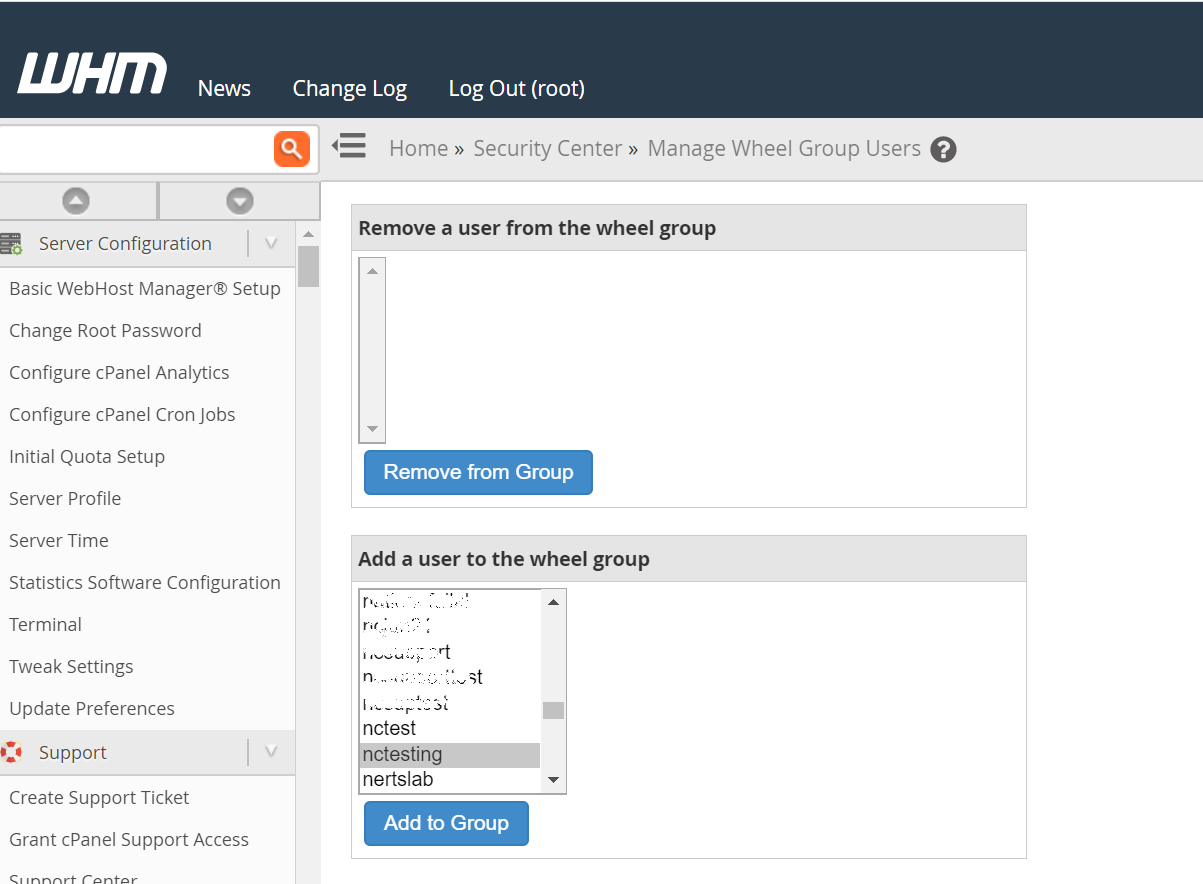
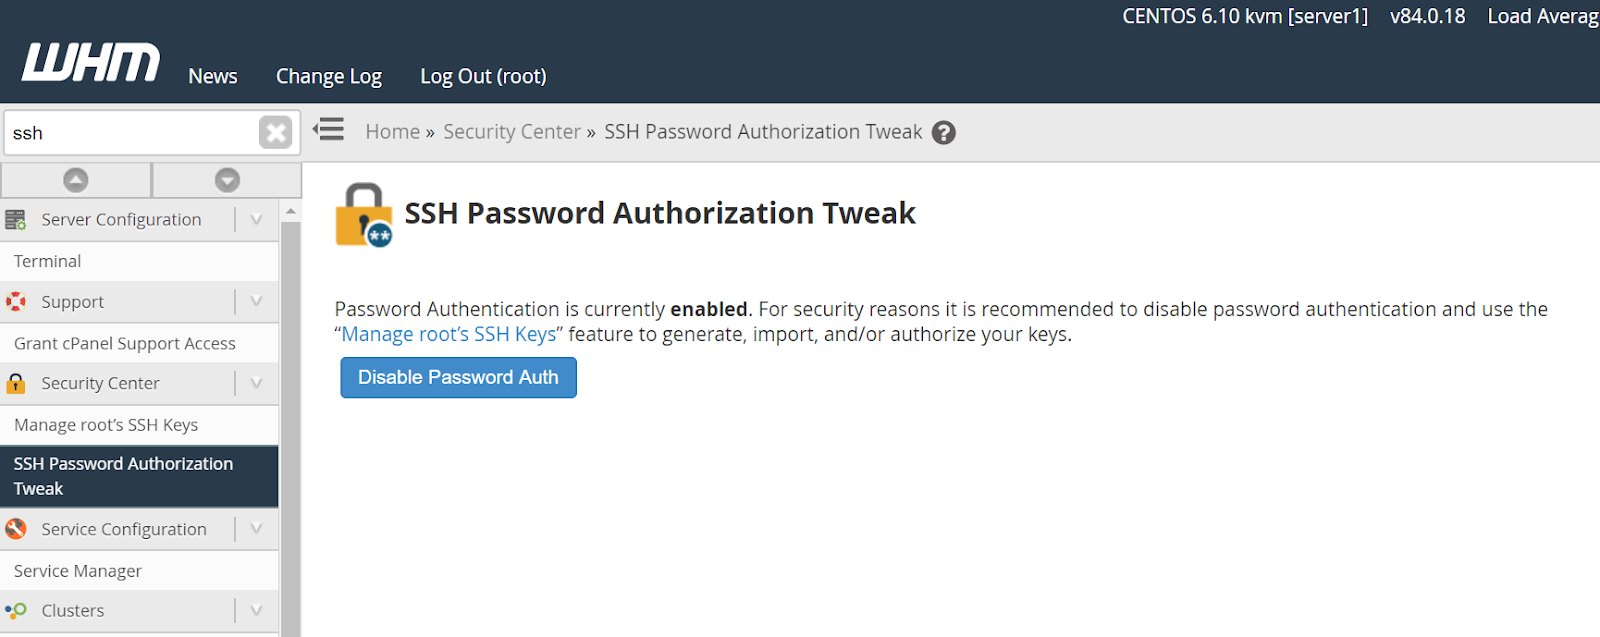
If you use a cPanel license for your server, you can disable password authentication using the SSH Password Authorization Tweak menu in the WHM panel.
NOTE: Once you press Disable Password Auth, all cPanel users will be able to access SSH only via SSH Keys.
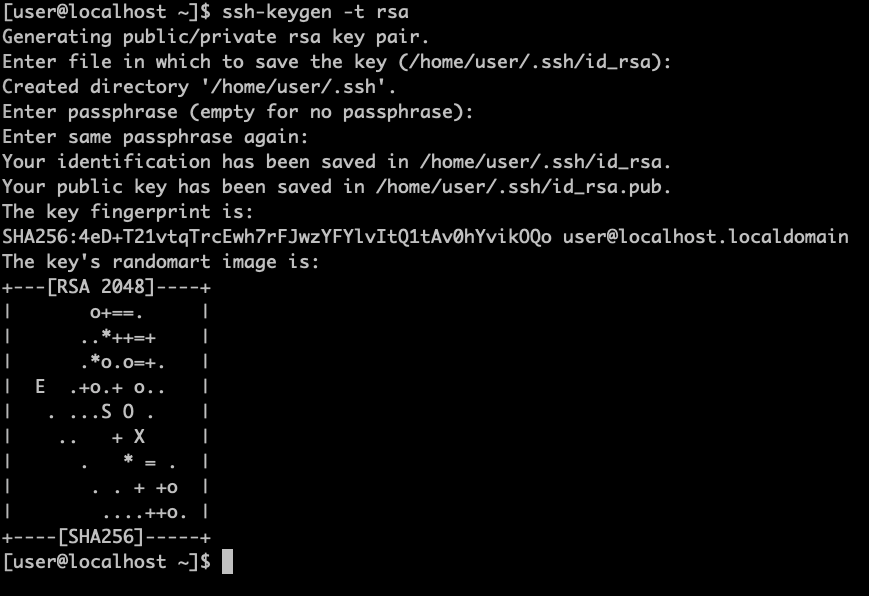
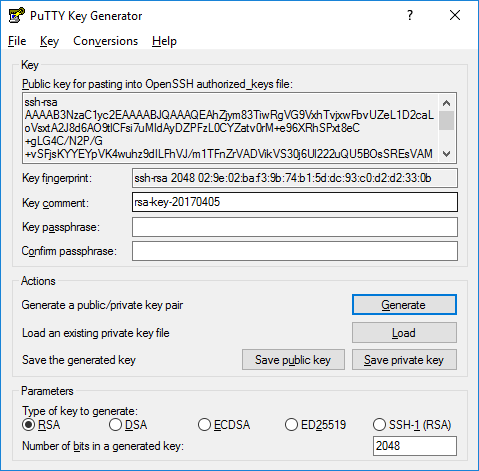
Generate SSH keys on your local machine (applicable for Linux and MacOS):
You will see this message:
> Generating public/private rsa key pair.
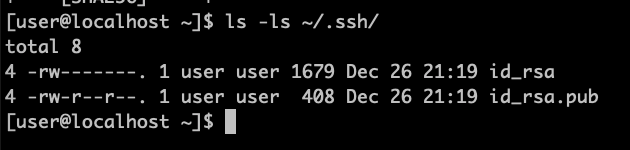
When you're prompted to Enter file in which to save the key, press Enter. This accepts the default file location and name. Just be sure not to overwrite your existing SSH keys. You can find them using the command (you can cancel the creation of SSH keys by using Ctrl + C shortcut and then run the command below to see if you have any keys already):
> Enter file in which to save the key (/home/you/.ssh/id_rsa): Press Enter.
At the prompt, type a secure passphrase. For more information, see Working with SSH key passphrases.
Enter passphrase (empty for no passphrase): Type a passphrase
Enter same passphrase again: Type passphrase again
The passphrase is used to protect your key. You will be asked for it when you connect via SSH. Generating SSH keys with no passphrase is not recommended for security reasons.
You can check the process of generating ssh keys below:
id_rsa id_rsa.pub
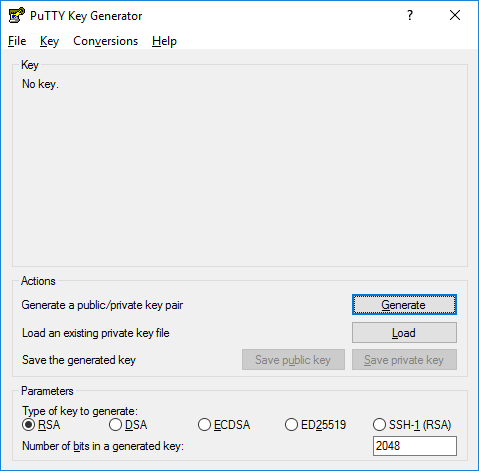
3. Optional: enter a key comment, which will identify the key (useful when you use several SSH keys).
4. Type in the passphrase and confirm it. The passphrase is used to protect your key. You will be asked for it when you connect via SSH.
5. Click Save private key and Save public key to save your keys accordingly.
Copying public key to your SSH server
You need to copy your public key to the server to a file called authorized_keys located in the same .ssh folder of your remote user on the server. There is a command in Linux and MacOS you can use to do this automatically:
ssh-copy-id -p your_custom_port_number techuser@yourserverIP
Or you can manually copy contents of id_rsa.pub (it’s important to copy contents of your public key, NOT the private one):

To edit the authorized_keys file on your remote server you can use this command once you are connected back to the server:
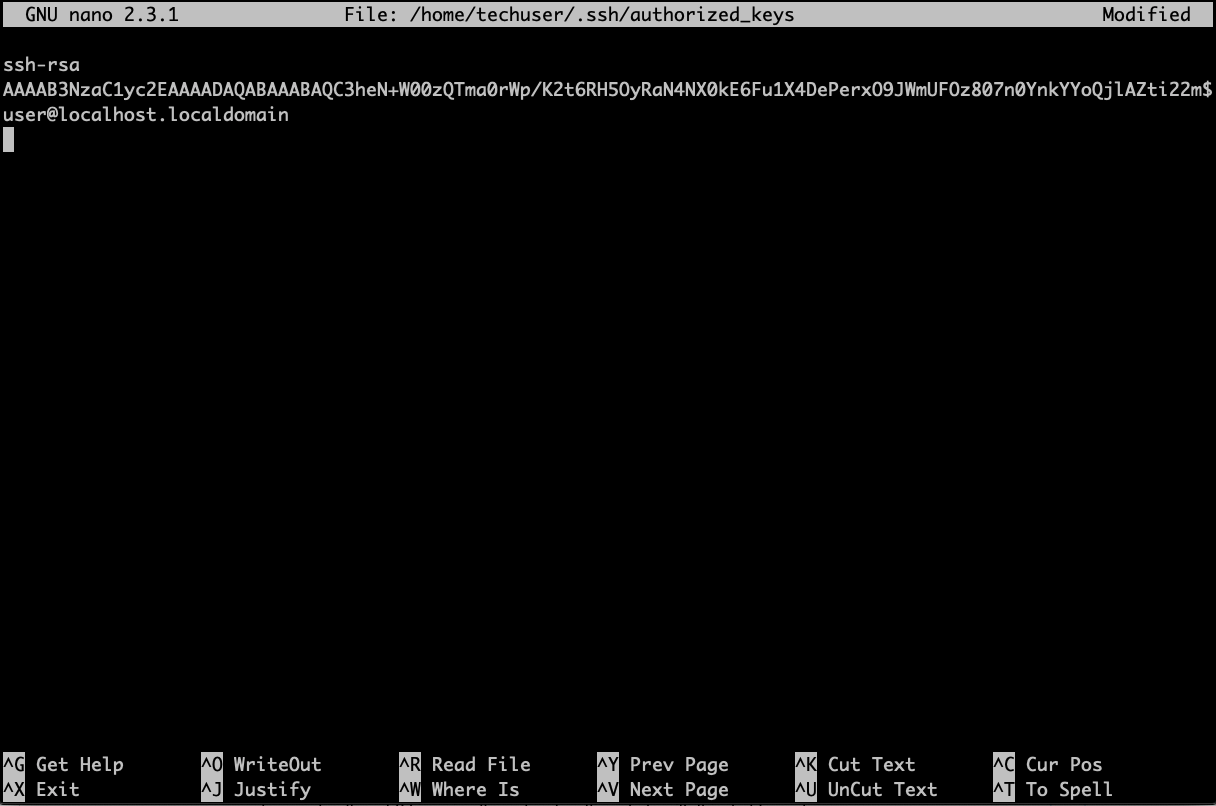
You will probably see all the pasted text in a single line, so it may appear differently on your screen.
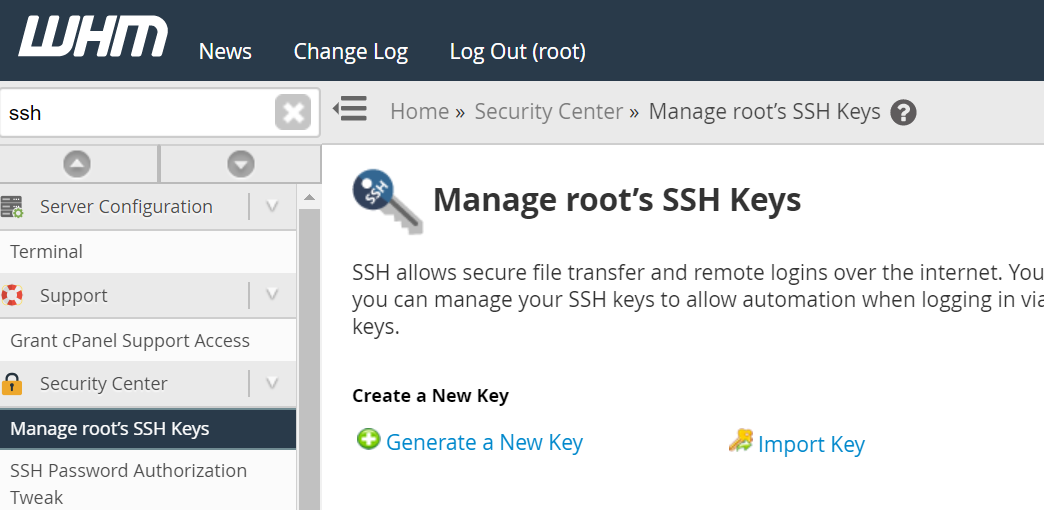
If you have a cPanel license, it is possible to set up SSH Keys using WHM or cPanel.
2. Go to Security Center >> Manage root’s SSH Keys >> Generate a New Key:
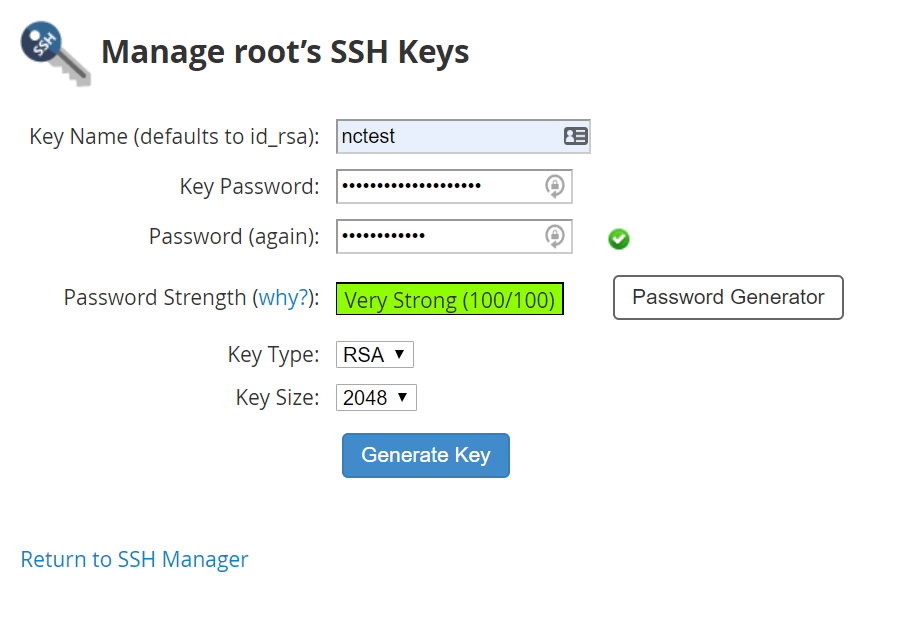
Key password: either enter or hit Generate Key
Password again: re-enter the password
Choose the type: RSA (slower to generate but faster to validate) or DSA (faster to generate but slower to validate)
Key Size: choose the Key size (the higher the number, the more security, but slower authentication speed)
And press Generate Key.
Once it is done, a pair of public and private keys are generated.
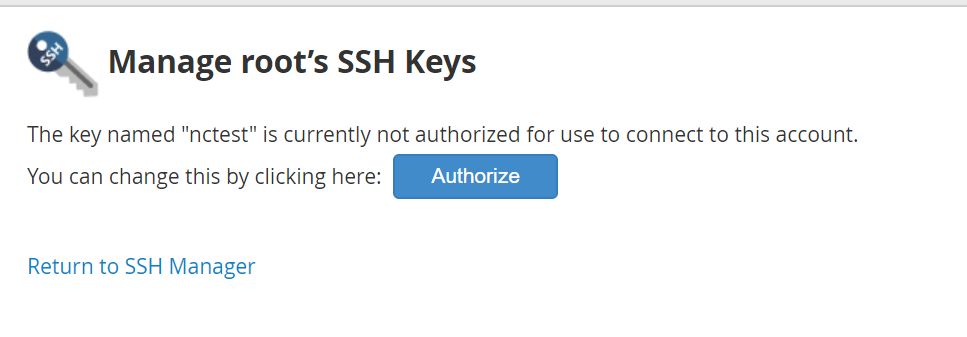
In order to use it for a login you need to Authorize the public key. To do so, please Return to SSH manager >> public_keys >> find out your keys and go to Manage Authorization.

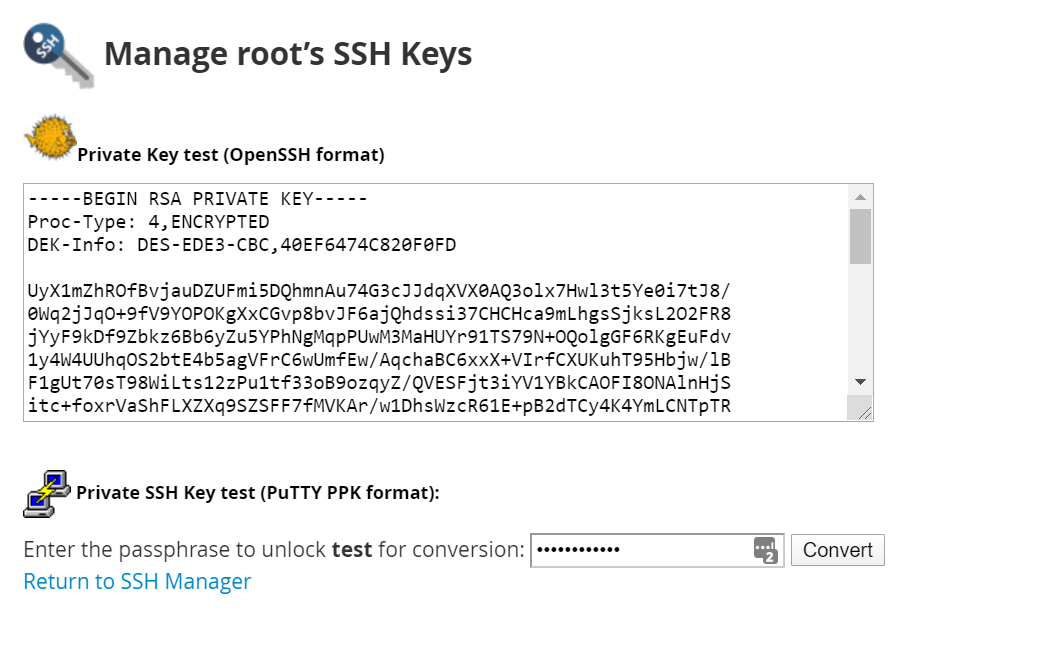
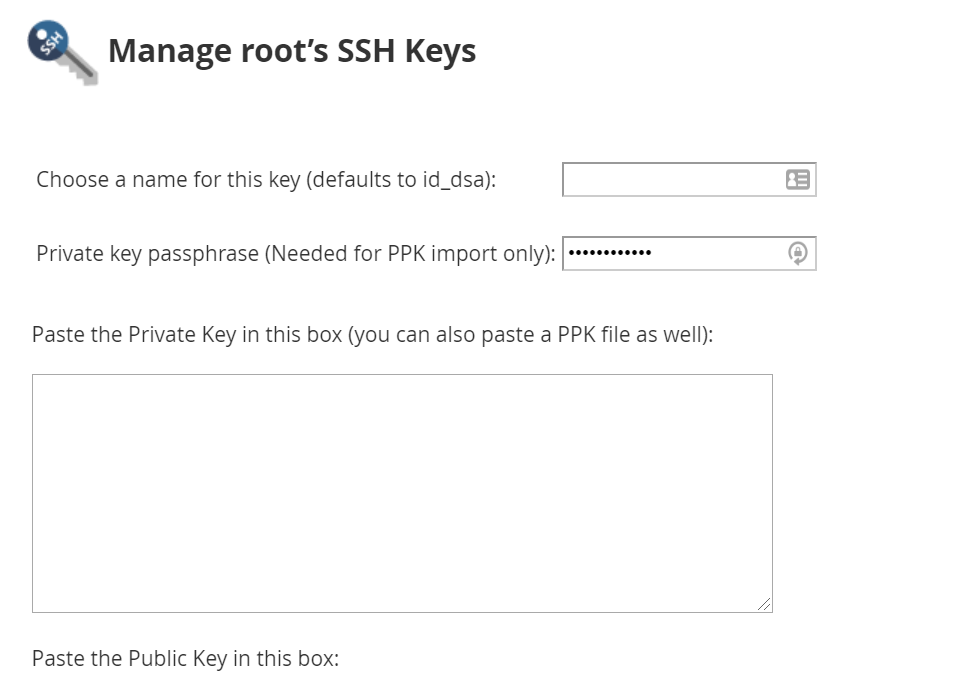
To import existing keys, you can go back to SSH manager, and find the Import Key option.

Import Key will redirect you to the following window. Please choose a name for this key and paste a desired (private or public) key you to import. It will also be possible to import a PPK key. If you don’t use one, you may leave this field empty.