There are many benefits of using a contact form versus posting an actual email address on your website:
- With a contact form, you can request specific information from your clients (e.g. phone number or company name).
- Customers are more likely to contact you if they can easily find and submit the contact form without having to open their own email program.
- The most important reason for using a contact form is to reduce incoming spam. When you display your email address on your website, there is a good chance that it might end up in the hands of a spammer. For extra security, you can also add reCAPTCHA to your form.
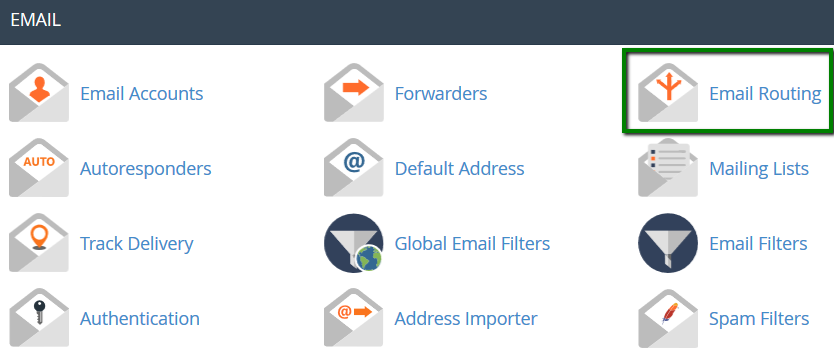
Select your subdomain (or domain) from the drop-down list, select Local Mail Exchanger, and click Change:
<?
$mail_to_send_to = "name@anydomain.tld";
$from_email = "from@yourdomain.tld";
$sendflag = $_REQUEST['sendflag'];
$name=$_REQUEST['name'];
if ( $sendflag == "send" )
{
$subject= "Message subject";
$email = $_REQUEST['email'] ;
$message= "\r\n" . "Name: $name" . "\r\n"; //get recipient name in contact form
$message = $message.$_REQUEST['message'] . "\r\n" ;//add message from the contact form to existing message(name of the client)
$headers = "From: $from_email" . "\r\n" . "Reply-To: $email" ;
$a = mail( $mail_to_send_to, $subject, $message, $headers );
if ($a)
{
print("Message was sent, you can send another one");
} else {
print("Message wasn't sent, please check that you have changed emails in the bottom");
}
}
?>
- $mail_to_send_to = "name@anydomain.tld" identifies the email address the message will be sent to. It can be any email address, including third-party services like Gmail, Yahoo, etc.
- $from_email = "from@yourdomain.tld" identifies the email address the message will be sent from. It should be a local email address (created in cPanel)
- Reply-To: $email" is the email address of the site visitor, assuming they specify one in the "Your email" field of the contact form. This email is then assigned as the "Reply To" address.
<h2>Contact us</h2>
<p><label>First Name:</label> <input name="name" type="text" /></p>
<p><label>Email Address:</label> <input style="cursor: pointer;" name="email" type="text" /></p>
<p><label>Message:</label> <textarea name="message"></textarea> </p>
<p><input name="sendflag" type="submit" value="send" /></p>
</form>
To use SMTP authentication you need:
- username (your full email address in most cases);
- password (password from that email account);
- hostname (server from which the emails are sent);
- port (465 with SSL, 587/25 with TLS);
- type of encrypted connection: SSL or TLS.
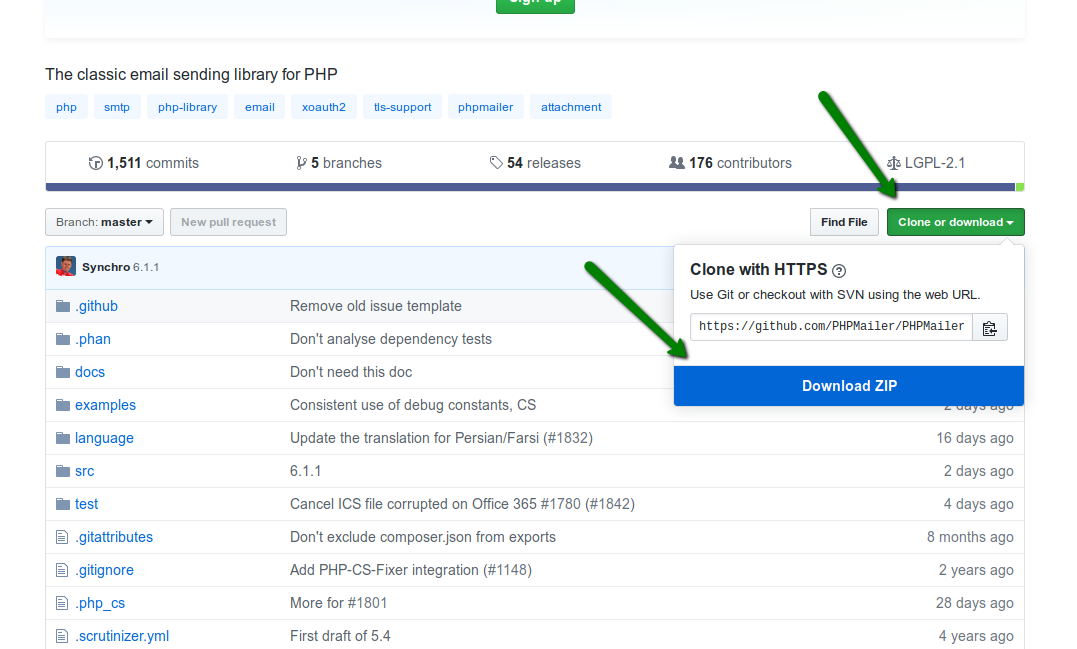
There are two installation methods available on our servers - installation using Composer and manual installation.
If your website is using Composer, you can simply add it to your requirements in the Composer.json file:
phpmailer/phpmailer
Alternatively, you can install it via ssh with the following command:
composer require phpmailer/phpmailer
PLEASE NOTE: Make sure to run the above command from the root directory of your website.
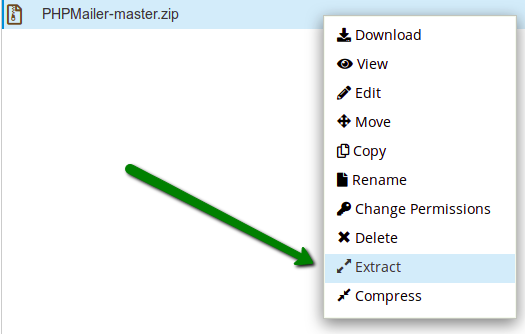
NOTE: replace /home/nctests/public_html/PHPMailer-master/src with the actual path to the PHPMailer-master/src folder if you are doing manual PHPmailer installation:
If you are using composer - load Composer's autoloader:
use PHPMailer\PHPMailer\PHPMailer;
use PHPMailer\PHPMailer\SMTP;
use PHPMailer\PHPMailer\Exception;
require 'vendor/autoload.php';
If you are not using composer - load the PHPmailer class files directly:
use PHPMailer\PHPMailer\PHPMailer;
use PHPMailer\PHPMailer\SMTP;
use PHPMailer\PHPMailer\Exception;
require '/home/nctests/public_html/PHPMailer-master/src/Exception.php';
require '/home/nctests/public_html/PHPMailer-master/src/PHPMailer.php';
require '/home/nctests/public_html/PHPMailer-master/src/SMTP.php';
$from = "youremail@domain.tld";
$namefrom = "Your Name";
$mail = new PHPMailer();
$mail->SMTPDebug = 0;
$mail->CharSet = 'UTF-8';
$mail->isSMTP();
$mail->SMTPAuth = true;
$mail->Host = "smtp.host.tld";
$mail->Port = 465;
$mail->Username = $from;
$mail->Password = "pass123";
$mail->SMTPSecure = "ssl";
$mail->setFrom($from,$namefrom);
$mail->addCC($from,$namefrom);
$mail->Subject = $subject;
$mail->isHTML();
$mail->Body = $message;
$mail->AltBody = $altmess;
$mail->addAddress($to, $nameto);
return $mail->send();
}
- $namefrom = Your Name is the name your recipient will see next to your email in the inbox
- $mail->Username is your full email address
- $mail->Password is the password to that email account
- $mail->SMTPAuth - enabling SMTP authentication
- $mail->Host is the hostname of the server that sends the emails
- $mail->Port is the SMTP port
- $mail->SMTPSecure is the type of the encryption
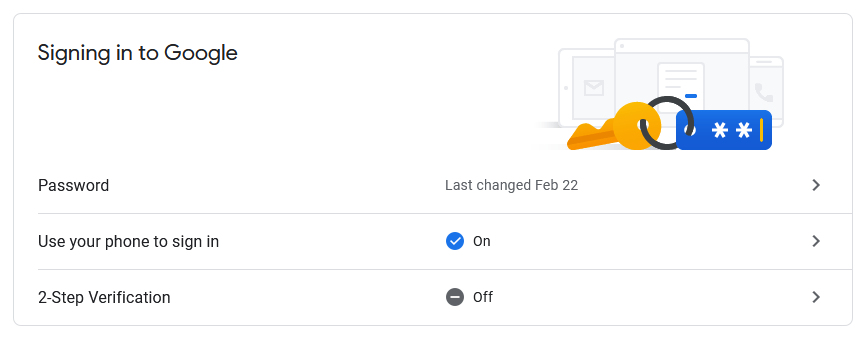
To be able to use a Gmail email address in your contact form, you need to make some changes in your Gmail account settings. This only applies if you want to send From the Gmail account. Skip this part if you use Gmail only in the To field.
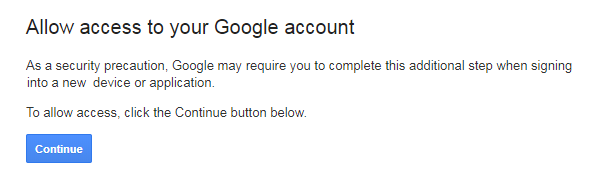
Google may block sign-in attempts from IPs which are located far from the usual geographical location of the mailbox owner. In such case, the “Suspicious sign in is prevented” email will appear in the Gmail inbox.
There are three steps:
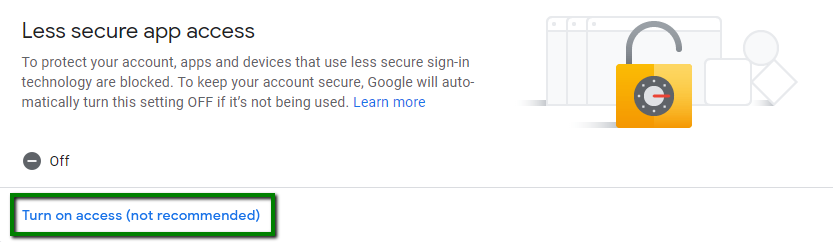
2. Scroll down to the Less secure app access section and click on Turn on access:
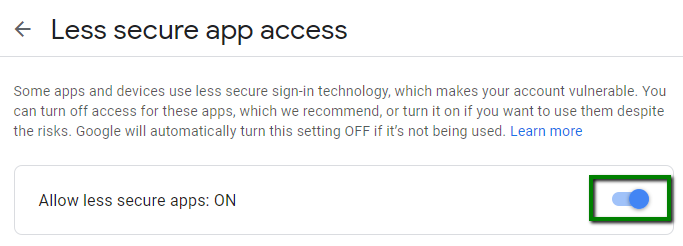
On the next page, turn the less secure app ON:
- Email sending method: SMTP;
- SMTP authentication: enabled;
- SMTP username: yourmailbox@gmail.com;
- SMTP password: password for this email address;
- SMTP hostname: smtp.gmail.com;
- SMTP port: 465 with SSL on.
By default, WordPress uses PHP mail() function to send emails. If you want to send WordPress mail from a third-party mail server or use SMTP authentication with your cPanel email account, you need to install an SMTP plugin. There are several SMTP plugins for WordPress. We will use the WP Mail SMTP plugin in this example.
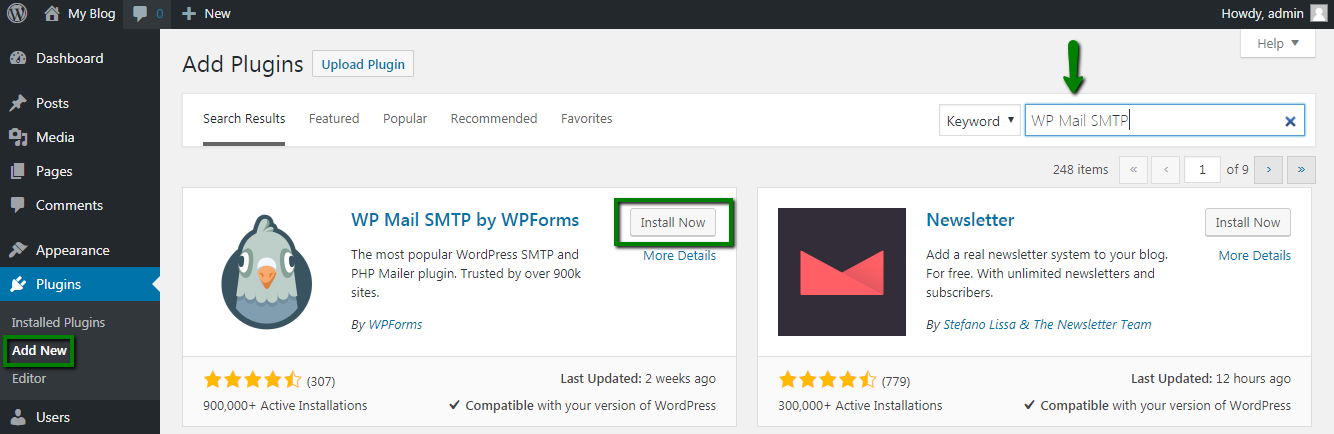
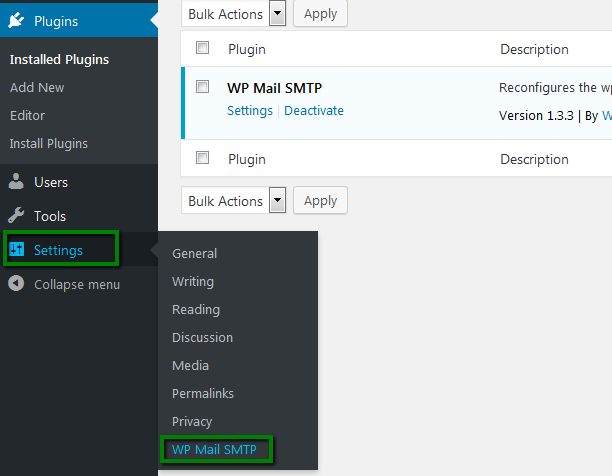
2. Once installed, click Activate. Then, go to Settings >> WP Mail SMTP to configure the plugin settings:
3. You can find an example of the SMTP setup below:
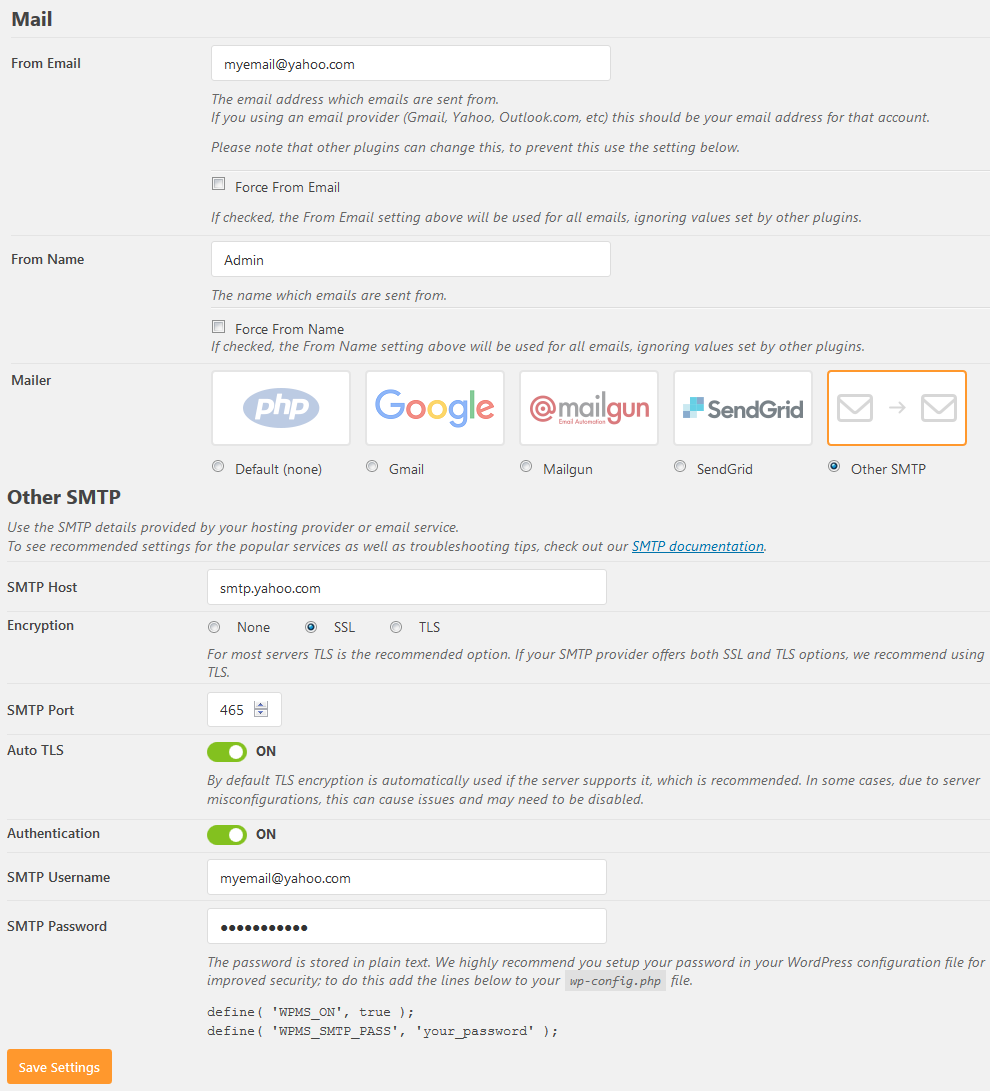
- From Email - the email address you want to use to send all WordPress emails from
- From Name - the name that the emails will be sent from
- Mailer - choose Other
- SMTP Host - hostname of the outgoing mail server (smtp.gmail.com for Gmail; mail.privateemail.com for Private Email; smtp.yahoo.com for Yahoo mail; server your account is hosted on for cPanel email, etc.)
- Encryption - TLS or SSL
- SMTP Port - 465 (SSL) or 587 (TLS)
- Auto TLS - if your server supports TLS encryption, you may enable this option
- Authentication - On
- SMTP Username - full email address
- SMTP Password - password for that email address
For more information on how to set up WordPress Contact Form 7, click here.
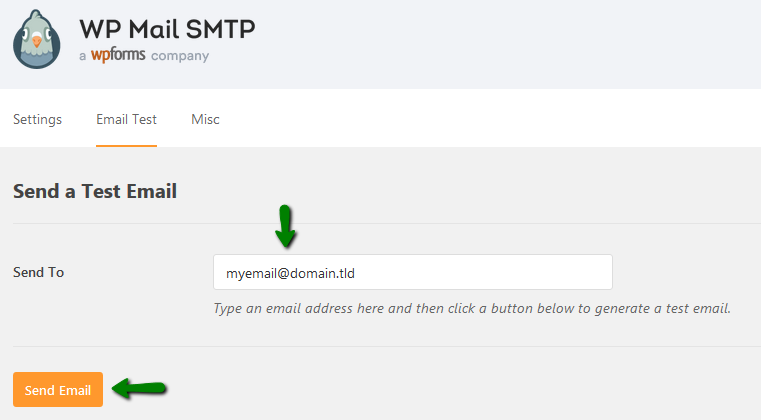
That's it!
