In order to migrate your website hosted with wordpress.com to Wvphost’s Shared Hosting or EasyWP service, you’ll need to export the .xml file which contains your pages, posts, comments, and file attachments.
NOTE 1: Your website theme will not be imported. You will need to install one anew.
You can do that in your Dashboard >> Appearance >> Themes >> Add New. Almost all free wordpress.com themes can be found in this list, so you can have your old one back.
NOTE 2: Premium themes that are licensed for WordPress.com use only cannot be transferred to self-hosted WordPress.org sites. Some of them though can be transferred to a self-hosted site at no charge as part of a Guided Transfer. You will need to create a post in the premium theme forums if you’d like to know whether your theme qualifies.
NOTE 3: Your website header will not be imported either. You can reinstate it in Dashboard >> Appearance >> Customize >> Header Image.
1. Log into your wordpress.com dashboard.
2. Go to Tools >> Export >> the Start Export option in the Free section >> Download Export File: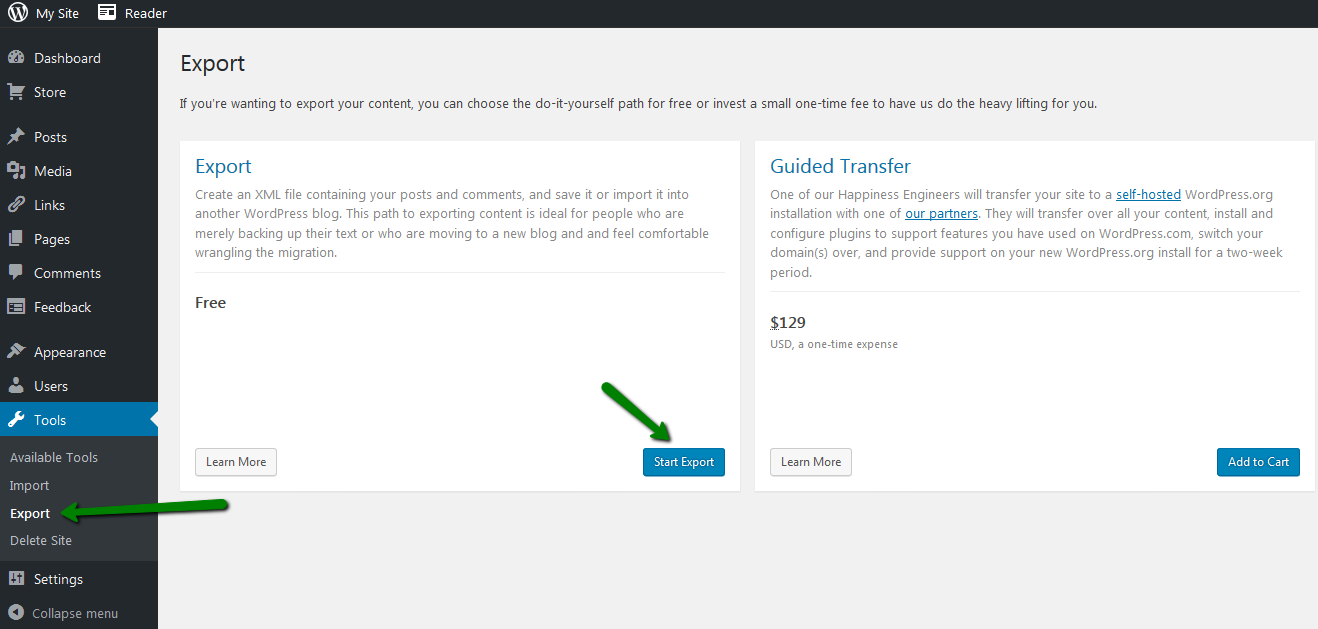

NOTE: In some cases when All Content is selected, it may miss some of the posts. In this case you can choose Posts and select the needed period of time.
3. The file will be downloaded to your computer.
4. Now go to your WordPress website dashboard hosted with us (yourdomain.com/wp-admin).
- If you have not installed WordPress yet, follow this guide.
- If you have an EasyWP subscription, WordPress’ dashboard may be found according to this guide.
5. Go to Tools >> Import: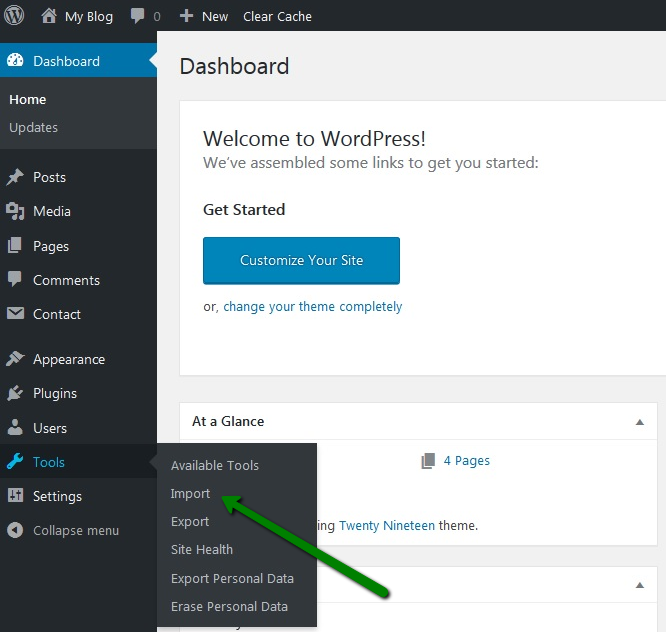
6. Click on Install Now in the WordPress section to proceed: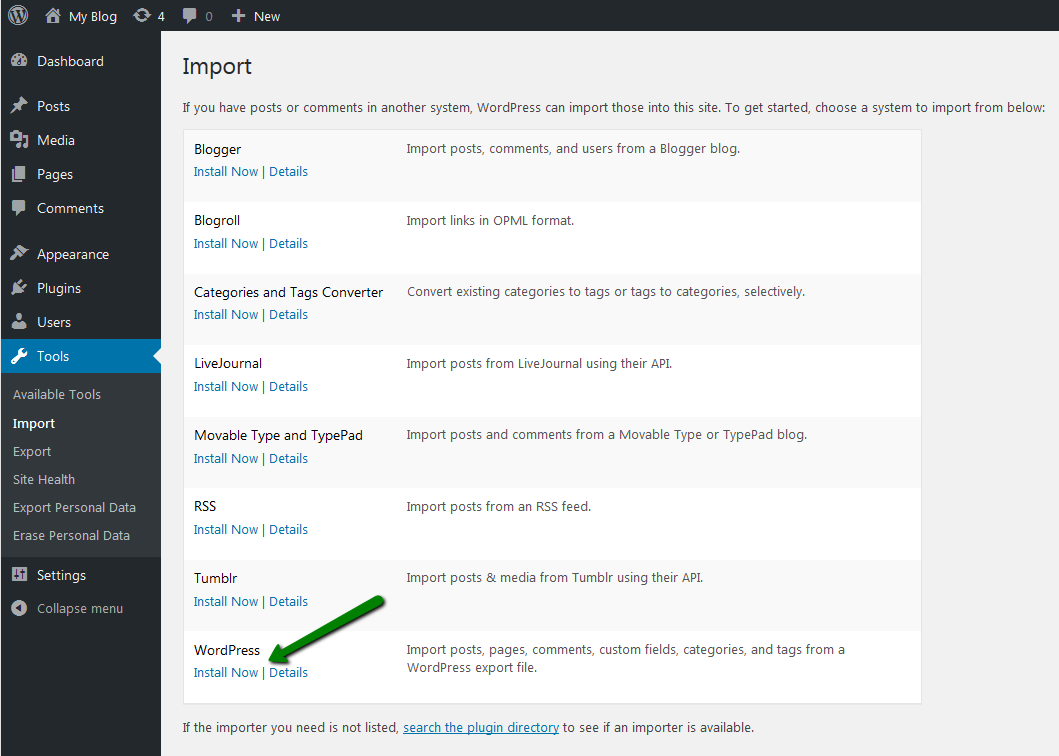
7. Once done, click on Run Importer: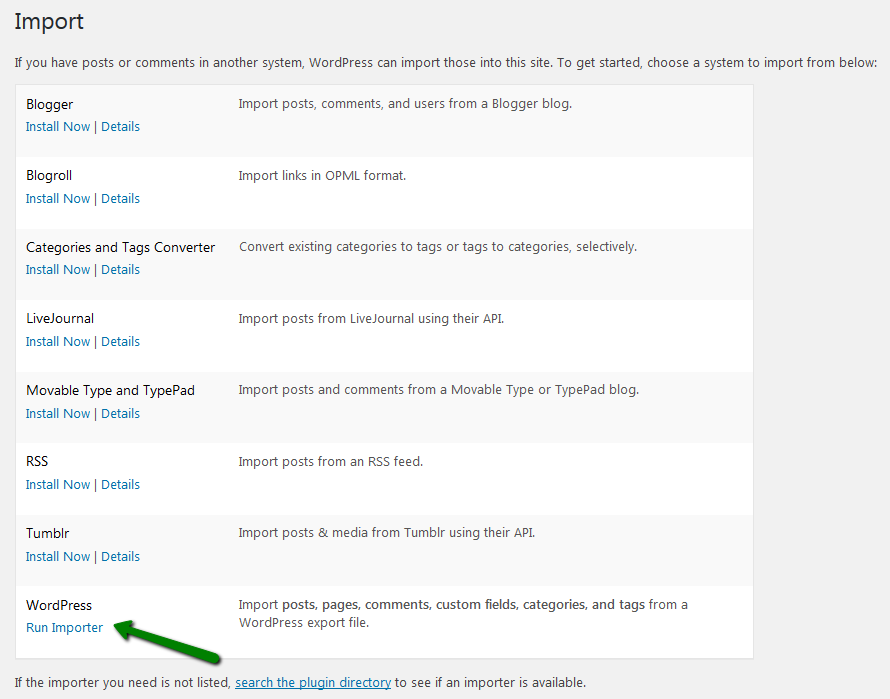
8. Choose the file you exported previously from wordpress.com and click on Upload file and import: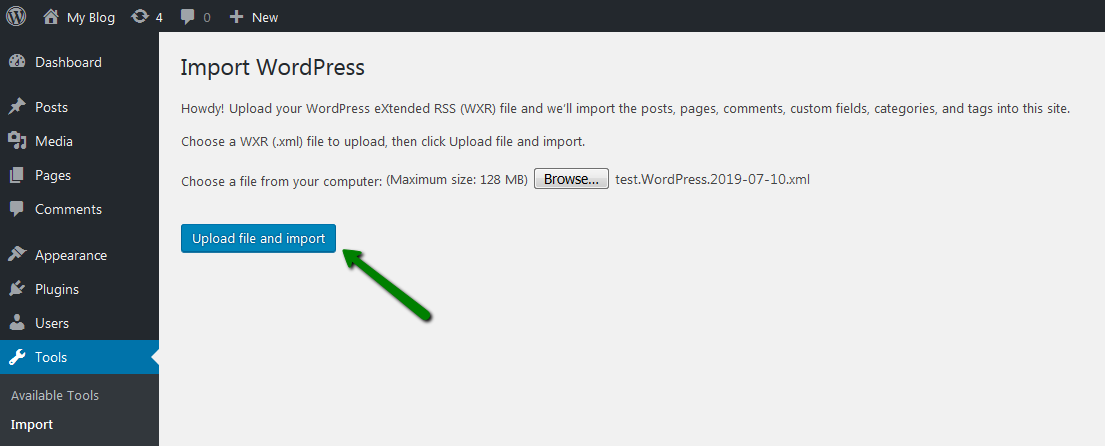
9. From the drop-down menu select the existing user you want to assign posts to or create a new user with the login name. Click on Submit: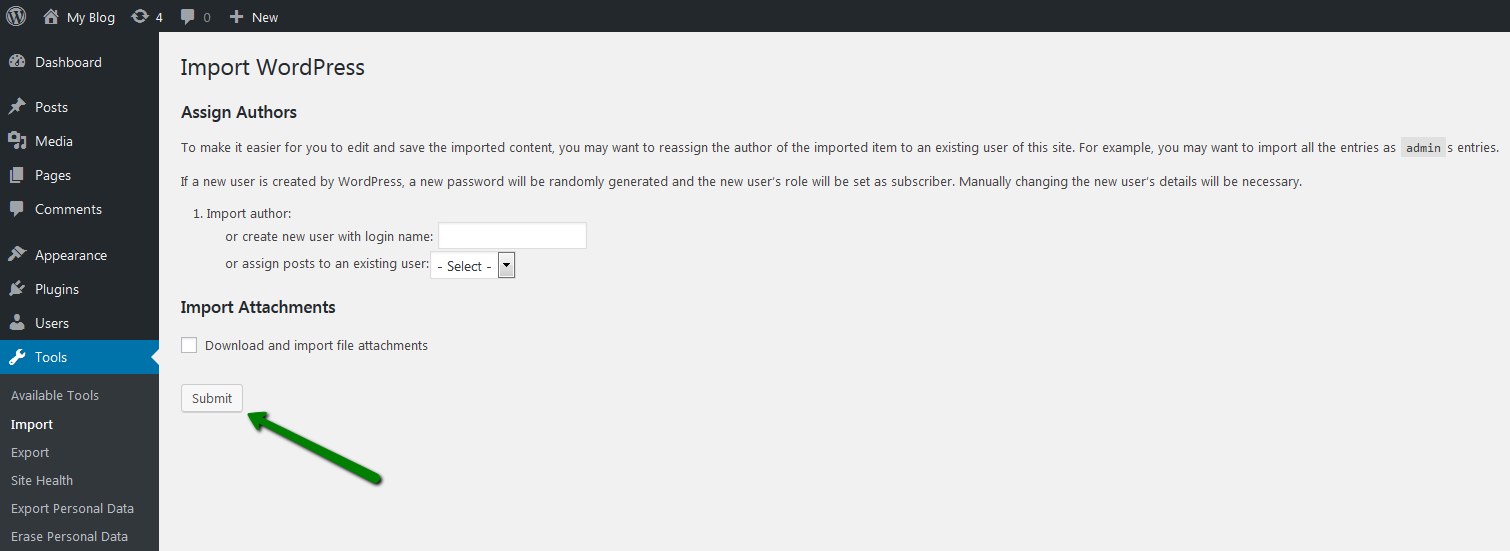
10. Once you’ve done this, go back to your homepage and see that your posts and comments have been imported.
11. Update your website’s name, remove the default post, adjust the menu bar, widgets, and enjoy your website as it was before!
That's it!
