Follow these steps in order to manually create an admin user in WordPress Database via phpMyAdmin:
NOTE: We recommend making a backup of your website before proceeding with any changes. If your WordPress was installed using Softaculous, you may follow this guide to backup your installation.
1. The first step is to locate the name of the database associated with your website. Go to cPanel > Files section > File Manager menu: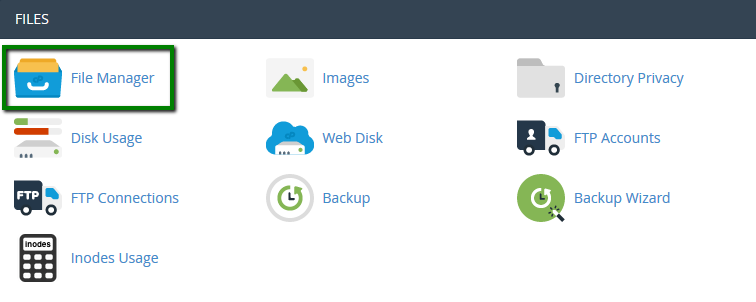
2. Find the wp-config.php file. Right-click on the file and select View or Edit option: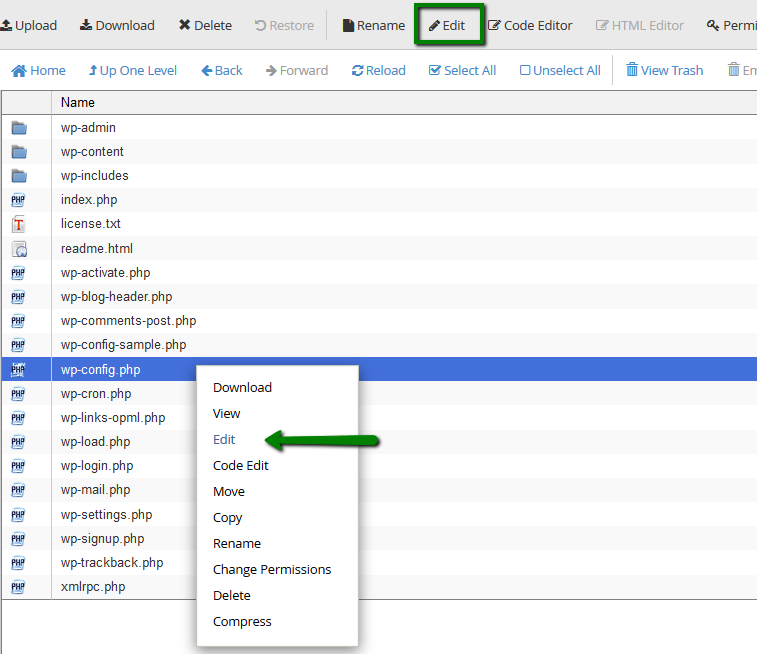
You will see the database name in this line: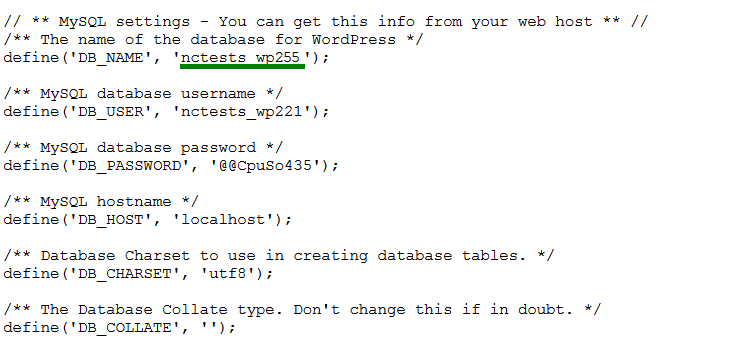
3. Go to phpMyAdmin menu in the Databases section: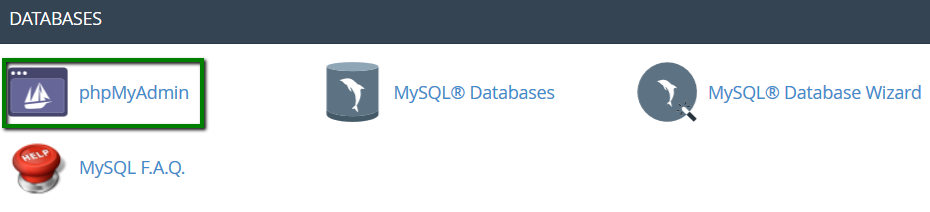
4. Click on the name of your database to expand the list of the tables and select wp_users table: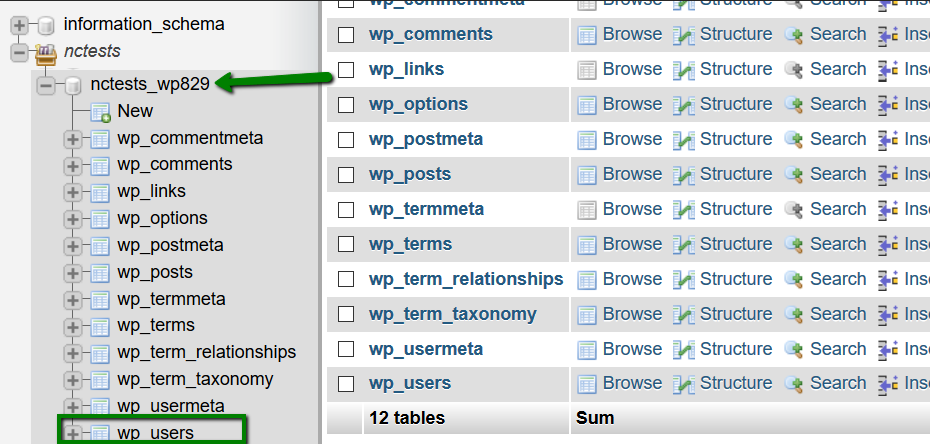
5. Go to the Insert tab:
Fill in the following information:
ID - any number you wish to assign to the user
user_login - username you want to use
user_pass - password for this user to access WordPress admin dashboard. You need to select MD5 from the drop-down menu in the Function column
user_nicename - you can set a nickname here
user_email - contact email of the new user
user_url - your website url
user_registered - date and time for when this user is registered
user_status - set this to 0
display_name - name, that will be displayed on the website
Once all the fields are filled in, click the Go button: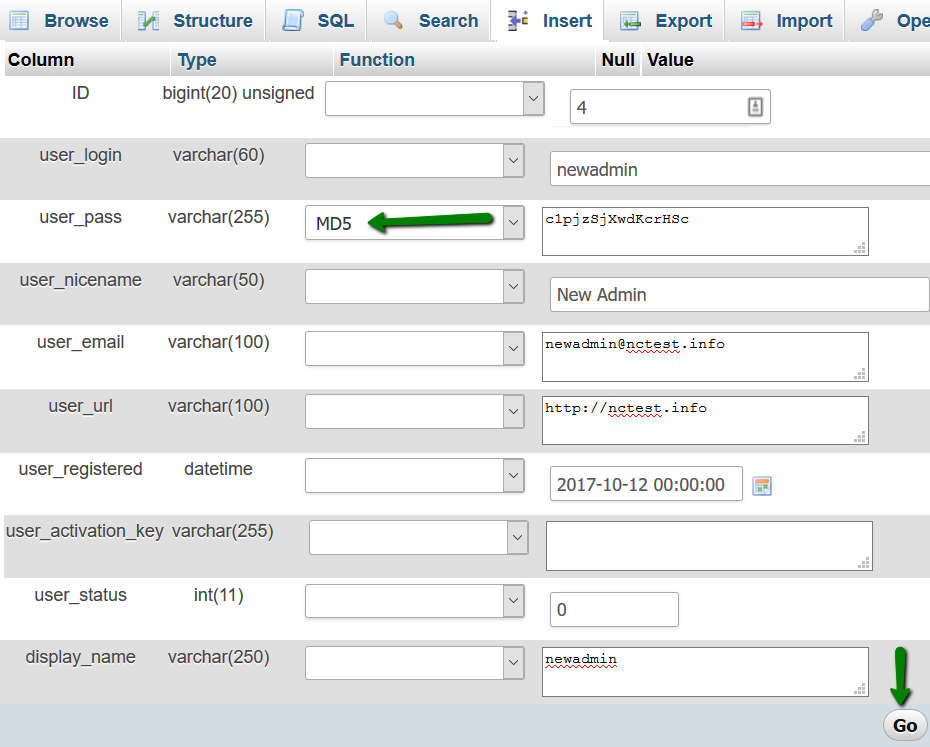
6. Now, go to the wp_usermeta table: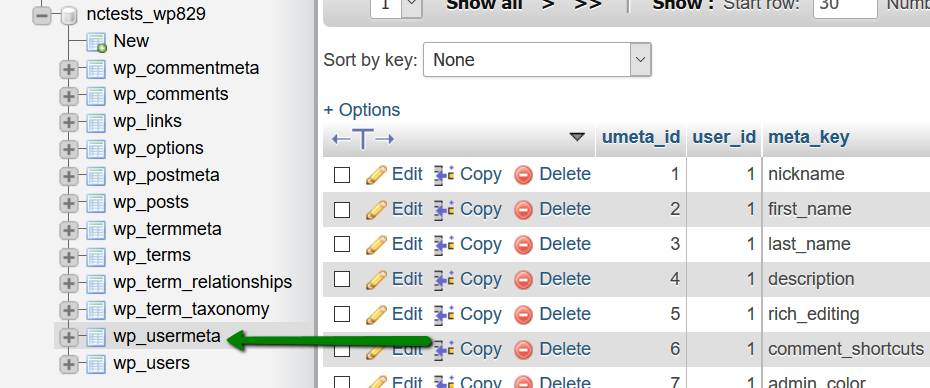
7. Go to the Insert tab:
In the first form, fill in the following information:
unmeta_id - leave this blank (it will be auto-generated)
user_id - ID you used for the user while adding it to wp_users table
meta_key - set it to wp_capabilities
meta_value - put the following:
a:1:{s:13:"administrator";s:1:"1";}
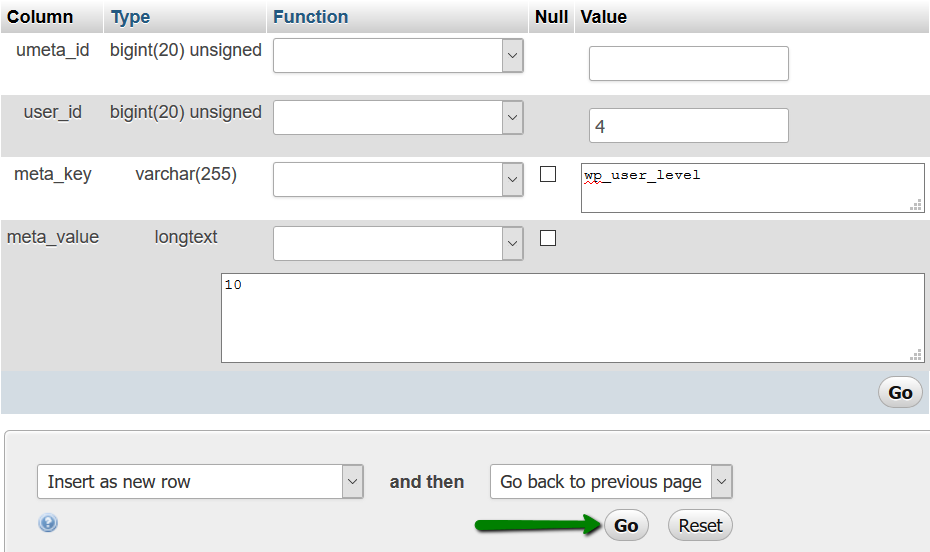
Fill the form below with the following details:
unmeta_id - leave this blank (it will be auto-generated)
user_id - ID you used for the user while adding it to wp_users table
meta_key - input following: wp_user_level
meta_value - insert following: 10
Once all the fields are filled in, click the Go button at the bottom: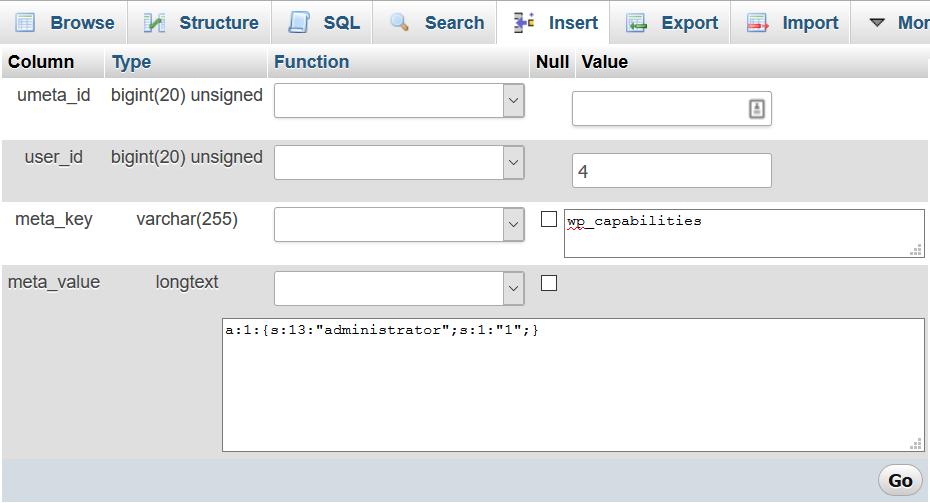
Now, you can access your WordPress admin dashboard using these new user details.
That's it!
